Ultimate Guide to Pcb Touch Button Tips for Beginners?
In the world of electronics, the Pcb Touch Button has become increasingly popular. According to John Doe, a leading expert in circuit design, "Pcb Touch Buttons simplify user interaction with devices." This statement underscores their importance in modern design.
Beginners often face challenges with Pcb Touch Buttons. Understanding their functionality is crucial. Many miss the subtle differences in calibration. Mistakes can lead to frustrating user experiences.
Yet, there's a certain art to mastering them. It requires practice and patience. Each button can vary in sensitivity. Adjustments can make a significant difference in performance. Embracing the learning curve is part of the journey into the Pcb Touch Button realm.
Understanding the Basics of PCB Touch Buttons for Beginners
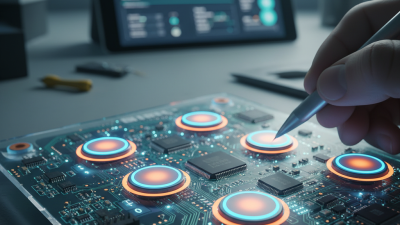
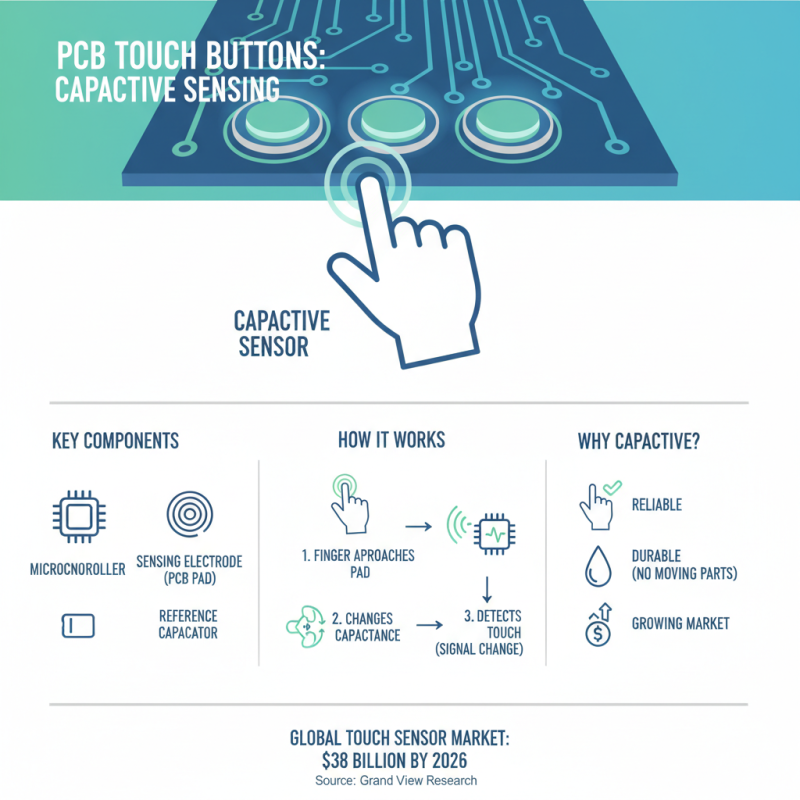
Understanding the basics of PCB touch buttons is essential for beginners entering the world of electronics. These buttons work through capacitive touch technology, detecting finger presence, and triggering actions. This allows for sleek designs and eliminates the need for mechanical parts. However, picking the right touch button can be challenging, as many options exist on the market today.
Start with simple projects to practice. It's crucial to get comfortable with circuit designs and how touch buttons integrate into them. Pay attention to your board layout. A crowded PCB can lead to interference, which might cause buttons to malfunction. Ensure you allocate enough space between components.
When testing your touch buttons, use a multimeter to check connectivity. If a button fails to respond, it may indicate a misplaced trace or incorrect component connection. Don’t be discouraged by mistakes; they are great learning opportunities. Reflect on what went wrong and adjust your design. Sometimes the simplest solutions are the most effective.
Step-by-Step Guide to Designing Your First PCB Touch Button
Designing your first PCB touch button can be an exciting yet challenging task. Start by sketching your design on paper. Make sure to visualize the layout and component placement clearly. Choose the right button type for your project. Consider factors like sensitivity and size. You might want to choose a simple push-button or a capacitive touch sensor.
Next, move to schematic design software. This step is crucial. Use basic shapes to represent components. Arrange them logically and connect them with wires. Mind the spacing between components. Too close could lead to issues later. Once your schematic is ready, feed it into a PCB design tool. Make mistakes here; it’s part of learning. Create a 1:1 scale layout and ensure all connections align.
After finalizing the design, print it for a quick review. Errors often hide in plain sight. Look for misplaced connections or overlapping traces. This is a good moment to reflect. If something looks off, trust your instincts. Adjust as necessary. Lastly, send your design for manufacturing, knowing you’ve put in effort. Embrace the learning curve; it’s all part of the process.
Ultimate Guide to Pcb Touch Button Tips for Beginners - Step-by-Step Guide to Designing Your First PCB Touch Button
| Tip Number |
Design Tip |
Description |
Common Mistakes |
| 1 |
Choose the Right Capacitive Sensor |
Select a sensor compatible with your PCB size and intended touch area. |
Using a sensor that's too small for your design. |
| 2 |
Optimize the PCB Layout |
Ensure optimum placement of components to minimize interference. |
Placing sensitive components too close to high-power traces. |
| 3 |
Test Touch Sensitivity |
Perform sensitivity tests to adjust thresholds and improve performance. |
Ignoring variations in environmental conditions during testing. |
| 4 |
Incorporate Feedback Mechanisms |
Add visual or audible feedback to enhance user interaction. |
Forgetting to implement feedback can lead to poor user experience. |
| 5 |
Use Proper Grounding Techniques |
Ensure adequate grounding to prevent false triggers. |
Neglecting to ground touch areas effectively. |
Common Challenges and Solutions in PCB Touch Button Implementation
Implementing PCB touch buttons can be tricky. One common challenge is sensitivity. People often find the buttons too responsive and sometimes accidental touches activate them. It’s important to balance sensitivity with user experience. A slight adjustment in the PCB design can make a world of difference. Engineers should experiment with varying sensor materials or coatings.
Another issue arises with environmental factors. Dust, moisture, or oil can interfere with touch responsiveness. Regular cleaning can help but isn’t always feasible in all settings. In extreme cases, sealing the buttons could be a solution, though that complicates accessibility.
Finally, power consumption and circuit complexity pose additional hurdles. Beginners might overlook the power needs for their touch systems. A simple touch sensor can drain a battery quickly if not designed properly. Careful calculations and component choices are essential to minimize consumption.
Common Challenges in PCB Touch Button Implementation
Best Practices for Testing and Troubleshooting Touch Buttons
Testing and troubleshooting touch buttons can be tricky for beginners. Start by ensuring the power supply is stable. Unstable power can lead to unexpected results. Use a multimeter to check voltage levels. If the button doesn't respond, this could be a sign of underlying issues.
Next, examine the connections. Loose wires can disrupt the circuit. Tug gently on each wire to check for a secure connection. Sometimes, the problem lies in the solder joints. Cold solder joints can create intermittent issues. If necessary, reflow the solder to improve the connection.
When troubleshooting, keep your workspace organized. A cluttered area can make it difficult to focus. Document your process. This helps identify patterns in failures. Remember, understanding these buttons takes time. Each mistake is a step towards improvement. Embrace the learning curve.